> ## Documentation Index
> Fetch the complete documentation index at: https://docs.junction.com/llms.txt
> Use this file to discover all available pages before exploring further.
# Link Flow
> Understand the end-to-end Junction Link flow for connecting wearable devices, from API key setup through Link Token generation.
Junction Link API covers **only** [cloud-based providers](/wearables/providers/introduction#cloud-based-providers).
Your mobile app has to manage connections with SDK-based providers — such as Apple HealthKit and Android Health
Connect — through the [Junction Mobile Health SDK](/wearables/sdks/health/overview), separately from Junction Link.
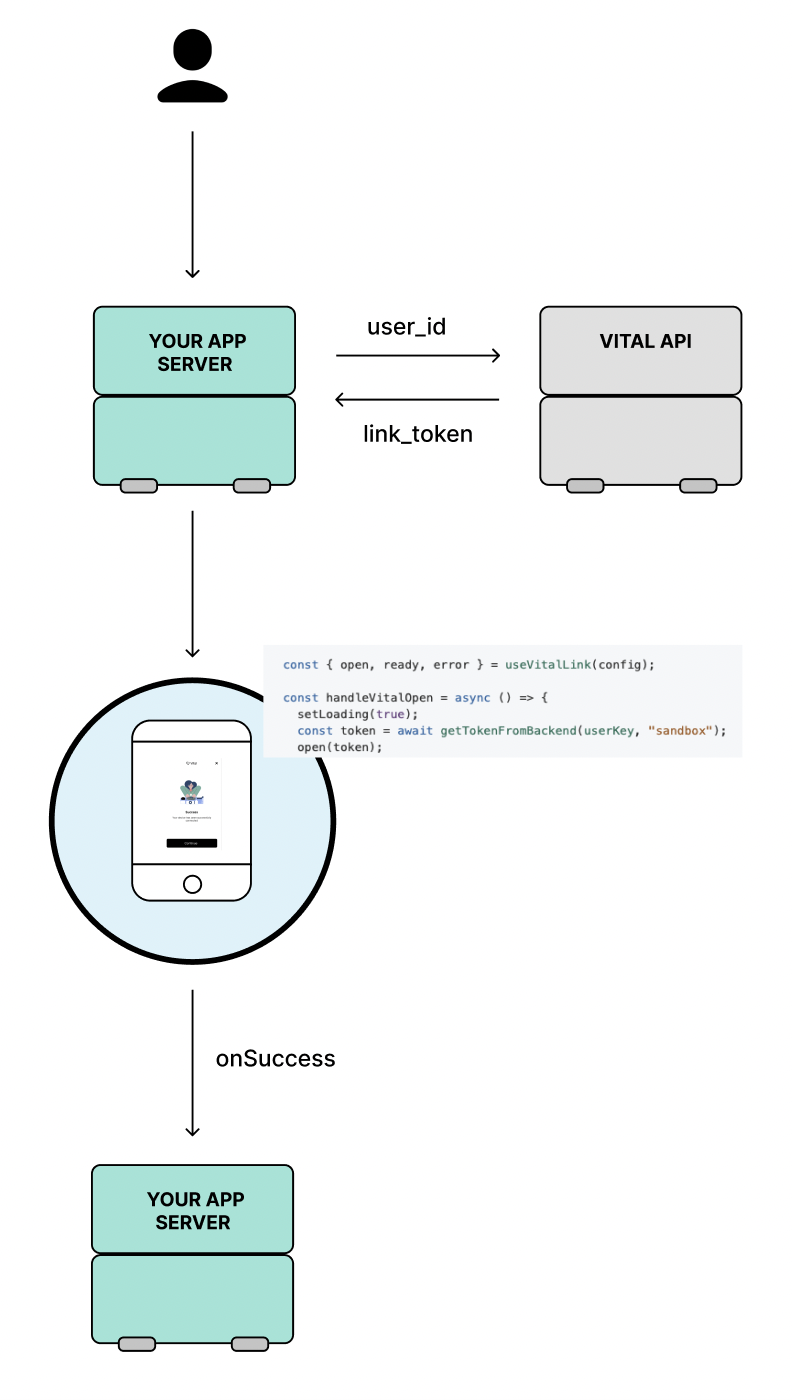
The Junction Link flow starts when a user wants to connect a wearable device with Junction. An overview of the process can be found below.
Make sure that:
1. You have your Junction Team API Key from the [dashboard](https://app.junction.com) ready to use.
2. You have created a Junction User that corresponds to a user in your domain. [See here](/home/quickstart#3-creating-your-first-user) for an example.
Call the [Generate a Link Token endpoint](/api-reference/link/generate-link-token) with the target User ID using your Junction Team API Key.
The API response provides a short-lived Link Token (`link_token`), as well as a Web URL (`link_web_url`).
You can use the Web URL to launch the Junction Link Widget directly. Alternatively, you can use the Link Token
in concert with the Junction Link API to [build your custom Link Widget experience](/wearables/connecting-providers/custom_widget).